
Part 1: Generate CSR and Private Key
- Access the CSR Generator:
- Go to RunSSL.com’s CSR Generator.
- Complete the Form:
- Fill in the form with accurate information using standard characters.
- Download Your CSR:
- Click the blue button to download your CSR in txt format.
- Save Your CSR:
- Keep the downloaded CSR file in a secure location; you’ll need it during the SSL certificate ordering process.
- Utilize SHA 256 Algorithm:
- Rest assured; our generator employs the secure SHA 256 Algorithm.
- Combined CSR and Private Key:
- Both your CSR and Private Key are conveniently combined in the same file. Use it wisely.
Part 2: Purchase and Install SSL Certificate
- Purchase Your SSL Certificate:
- Choose a suitable SSL certificate, for example, PositiveSSL DV.
- Provide CSR During Order:
- During the ordering process, you’ll be prompted to input your CSR. Use the saved CSR file from Part 1.
- Download Issued SSL Certificate:
- Once issued, download your SSL certificate and save it securely.
Part 3: Install SSL Certificate on IIS
- Access IIS Manager:
 Launch IIS Manager and click the server name in the Connections menu.
- Open Server Certificates Manager:
- On the server’s Home page, double-click Server Certificates in the IIS section.
- On the server’s Home page, double-click Server Certificates in the IIS section.
- Open Complete Certificate Request Wizard:
- On the Actions menu, click “Complete Certificate Request…”
- On the Actions menu, click “Complete Certificate Request…”
- Specify Certificate Authority Response:
- Click the … button to locate your certificate. Add it to IIS.
- Specify a Friendly Name for easy identification.
- Select Web Hosting as the certificate store and click OK to import.
- Click the … button to locate your certificate. Add it to IIS.
- Set Certificate Bindings:
- Return to the server home page in IIS. In Connections, expand Sites and click the site needing SSL.
- In the Actions menu, click “Bindings…”
- For new installation, click Add. For replacements, click Edit.
- In the Add Site Bindings window:
- Type: https
- IP Address: Select your site’s IP Address or All Unassigned.
- Port: 443
- Host Name: Not required for a single-name certificate.
- If installing on multiple sites, enter the domain for each site.
- SSL Certificate: Select your site’s certificate from the drop-down.
- Click OK when configured.
- Restart IIS:
- For changes to take effect, restart IIS. You can do this in the Actions pane by clicking on “Restart.”
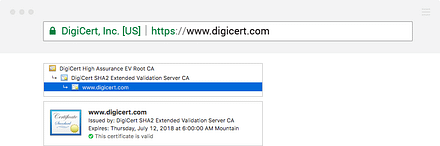
- Test Your SSL Installation:
 Launch IIS Manager and click the server name in the Connections menu.


- Open your website using “https://”. A secure padlock icon should indicate successful installation.
Congratulations! Your website is now fortified with SSL. Check for the padlock on your site or use an online SSL Checker tool for verification. Your website is secure, ensuring a safe user experience.


